Bing wallpaper of the day - Gnome
December 1, 2024 Reading time: ~1 minute
Bing produces a wallpaper every day and it changes every day at UTC 00:00:00.
you can query Bing for the latest wallpaper and save it to your desktop wallpaper.
Firstly, Gnome uses the $HOME/.config/background file,
which is an image. It can be opened using a photo app.
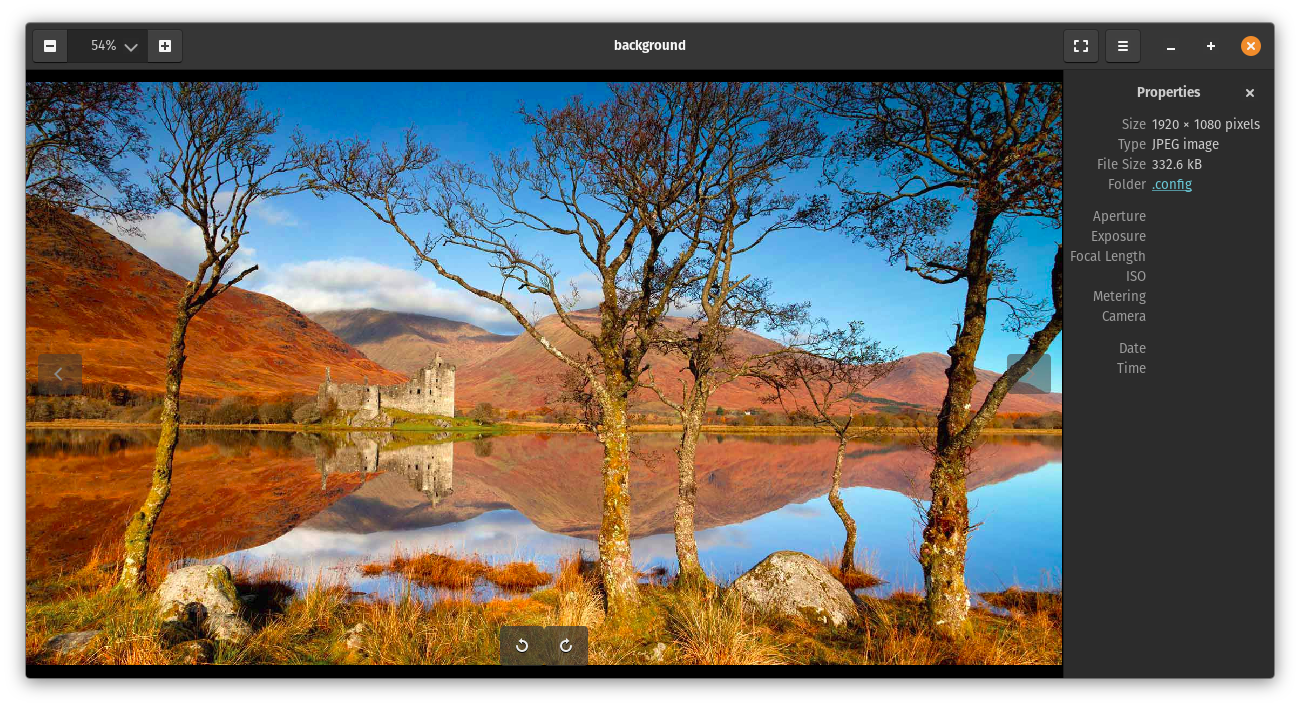
Above is the current screenshot of my background taken from $HOME/.config/background.
So, if you manipulate the $HOME/.config/background file, you can set any background you want, whenever you want. Changes take place immediately.
Just make sure you have the correct ownership and access set on the file. The file should be like the following:
-rw-rw-r-- 1 lazy lazy 332568 Dec 1 07:29 .config/background
Which means (reading from left to right), owner (me) read/write, group read/write, others read only. if not run in a terminal
chmod 664 $HOME/.config/background
Then all you need to do is use dconf-editor to change the background to be ~/.config/background
Customising pop_OS (and Gnome) backgrounds
November 30, 2024 Reading time: ~1 minute
In order to add custom backgrounds, you need to add an xml file.
ASetting up ufw for docker
June 16, 2024 Reading time: ~1 minute
https://github.com/chaifeng/ufw-docker
Docker Rootless Setup.
June 16, 2024 Reading time: ~1 minute
In order to get the external ip address of the visitor to traefik. you need to tell docker the following...
Put the following in a file in ~/.config/systemd/user/docker.service.d/override.conf
You may need to make the docker.service.d directory
[Service]
Environment="DOCKERD_ROOTLESS_ROOTLESSKIT_PORT_DRIVER=slirp4netns"
This is required for docker to pass the client ip address to traefik.
How to mount a Virtualbox vdi with LVM
January 20, 2024 Reading time: 3 minutes
To mount a Virtualbox *.vdi file, you need to convert it to an image first.
Before that you need to find the details of it.
VBoxManage showhdinfo ubuntu.vdi
This will give you an output like below
UUID: f77dd722-5112-4a9c-9961-baca7ec93ae3
Parent UUID: base
State: created
Type: normal (base)
Location: /home/lazycoder/VirtualBoxVMs/Elementary/Elementary.vdi
Storage format: VDI
Format variant: dynamic default
Capacity: 20480 MBytes
Size on disk: 12674MBytes
Encryption: disabled
Property: AllocationBlockSize=1048576
In order now to convert the *.vdi, we need to convert it to an image file *.img
VBoxManage clonehd --format RAW Elementary.vdi Elementary.img
Now you need to find the type of filesystem is in the image you just created.
sudo fdisk -l Elementary.img
The output should be like below, note the filesystem type is Linux, this means it is ext3 or ext4
Disk Documents/Elementary.img: 20 GiB, 21474836480 bytes, 41943040 sectors
Units: sectors of 1 * 512 = 512 bytes
Sector size (logical/physical): 512 bytes / 512 bytes
I/O size (minimum/optimal): 512 bytes / 512 bytes
Disklabel type: dos
Disk identifier: 0xf4e707ae
Device Boot Start End Sectors Size Id Type
Documents/Elementary.img1 * 4096 2542966 2538871 1.2G 83 Linux
Documents/Elementary.img2 2542968 41938942 39395975 18.8G 83 Linux
At this point, if you try and mount this image, it will give an error like below:
sudo mount -t ext3 -o loop,rw ./Elementary.img /mnt
mount: /mnt: wrong fs type, bad option, bad superblock on /dev/loop0, missing codepage or helper program, or other error.
So there is something wrong with the image, the way we find out about the image is to run fdisk -l on it and see what is actually in the img file. Run
sudo fdisk -l Elementary.img
So now the output is below...
Disk Elementary.img: 20 GiB, 21474836480 bytes, 41943040 sectors
Units: sectors of 1 * 512 = 512 bytes
Sector size (logical/physical): 512 bytes / 512 bytes
I/O size (minimum/optimal): 512 bytes / 512 bytes
Disklabel type: dos
Disk identifier: 0xf4e707ae

Device          Boot   Start      End  Sectors  Size Id Type
Elementary.img1 *       4096  2542966  2538871  1.2G 83 Linux
Elementary.img2      2542968 41938942 39395975 18.8G 83 Linux
You notice there is the Elementary.img1 and Elementary.img2, now we have to mount the bigger of the two because that is the root filesystem, the other is the swap partition. To mount the Elementary.img2 we need to do the below:
So now we know the layout of the image, we can mount the partition Elementary.img2 by setting the offset
We find the offset by the below formula
Sector size * Start = (in the case) 512 * 254968 = 1301999616
So now we set up the loop filesystem as below
sudo losetup -o 28672 /dev/loop0 sda.img
That will create /dev/loop0 for us and now you can operate on it.
LazyCoderOZ
This is my blog on my discoveries and notes so I don't forget how I have done things :)